This page is designed for educators that want to introduce this safe, educational and fun hobby to their students. This pages is specifically designed for the classroom educator, scout leader, church leader, 4H leader, or space enthusiast who want to do model rocketry as a group.
eRockets has provided material sources and advice for a number of years providing successful endeavors across the United States.
Helpful tips:
#1 Buy and Build with the proper age group.
Building rockets is not difficult and kids as young as 5 years old can do it with the help and patients of an adult.
However, the best age group to start with is the 9 to 10 year old range. These kids have the attention span and reading ability to be successful with a little bit of encouragement.
Don't get me wrong, a build and fly session can be successful with younger kids (providing one on one supervision for every kid under 9) all the way up to adults. Many rocketry Sections with the NAR hold build sessions every year and may help your group if you ask for help. www.nar.org
#2 Have enough building supplies for each table to use. Each kit has different needs so take that into consideration for special things like plastic model cement, or hobby knives.
Also be sure to provide news paper to protect the furniture and paper towel to clean up hands and other messes.
#3 Letting the glue dry. Different manufacturers have different methods in their instructions on use of glue. The best advice is to teach the kids from the beginning to use glue sparingly, if it is running there is too much. all of the manufacturers with balsa fins instruct to put another layer of glue between the fin and body tube, this is called a fillet and is there to strengthen the joint. Again, if it runs there is too much.
#4 Super Glue can be a real problem and I do not recommend using it. However, it does not hurt if the instructor has a bottle available to help the process along towards the end of the build to help stragglers get caught up. And be available on the field to make quick repairs.
#5 As in instructor you are expected to have all of the answers. So learn about the subject by building one of the kit ahead of time. This will allow you to wander around the room and answer questions and advise the builders. Plus you get to show them the finished product.
#6 Have the kids read their own instructions and do their own work. If they are not old enough to read have a helper help them, after all this is educational in more than one way.
#7 Have your launch equipment in order ahead of time. If you do not own a launch pad and controller buy a starter kit that has everything you need in it. Have a reliable power supply and be prepared to use your car battery if the primary supply fails.
#8 The model rocket safety code is an important factor in having a safe launch. Make yourself aware of what is in the code and follow the code to set a good example for the kids. Oh, and don't forget that a countdown is a group activity!
#9 Have fun!
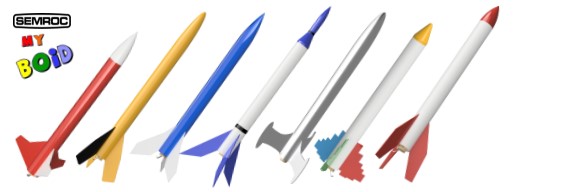
Semroc My Boid
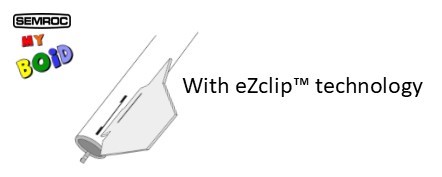
The My Boid by Semroc is our top pick for groups that are building rockets. Each kit is built with the same body tube and eZclip slots, but each kit contains different Nose Cones and different fins. Each rocket is unique to the builder. This Easy to build Skill Level 1 kit is economical to fly on mini motors like the 1/2A3-4T from Estes that is available in a bulk pack. Each kit contains a Precision Turned Balsa Nose and a Bright Streamer for recovery. Build with Scissors, Pencil, White or Wood Glue, and Masking Tape. Please allow the glue to dry at least 1 hour before flying.
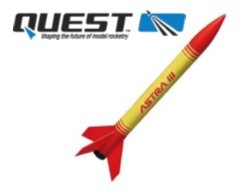
Quest Astra III

The Quest Astra III is an excellent kit for a group built. Step 1, tying the first knot is the hardest step. [See Video] This rocket is so easy to build that glue is not really needed except to glue the fin can to the body tube. Tape can also be used to do this step. This is an easy to assemble Skill Level 1 kit that flies on standard 18mm motors like the A4-4, A8-3, B4-4, B6-4, or C6-5 all of which come in bulk packs. This rocket includes a parachute that needs to be assembled. However, a crate paper streamer of 8' can be substituted for a safe recovery. Build with scissors, Pencil, and model cement, Masking Tape. This rocket can be flown immediately after being assembled grated tape is used to secure the body to the fin can.
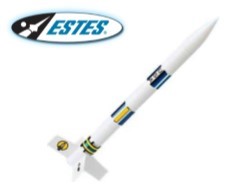
Estes Generic

This is a favorite for group builds and contains a lot of basic model rocket pats and assembly technique. Instructors: I highly recommend building one of these prior to your build session. I also reccomend dry fitting everything in a model prior to each class to remind you of the downfalls. A modeling knife is required to build this kit. If the builders are too young to handle a model knife an adult should be designated to cut each engine hook slot for the students when they get to that step. A pair of pliers would also be useful to remove the nub on the Nose Cone where the shock cord attaches. This rocket has a 3 fold paper shock cord attachment to the inside of the body tube. This part must be completely dry prior to flight. I reccomend a 2 hour dry time prior to flight. The parachute is pre-assembled in this kit, however, a crate paper streamer of 8 feet can be substituted.
This rocket flies on A8-3, B6-4 or C6-5 all of which are available in bulk packs. Build with: Scissors, Hobby Knife, White or Wood Glue, Model Cement, Masking Tape.
These recommendations come from long time flyer and rocketry enthusiast Randy Boadway. Randy has helped thousands of kids build their first rockets over the years. You can also drop him a note if you have any questions about group builds. erockets@rocketmail.com


