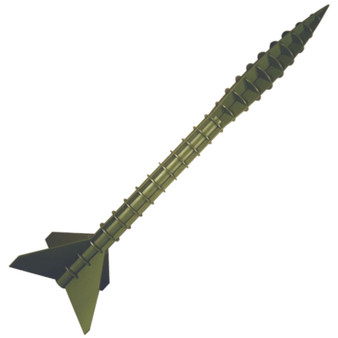
Rocketarium Retro Rebel Rocket Kit
It all started when Duke Redsmith bestowed upon himself the title of 'Grand Emperor For Life'... Grand Emperor Redsmith ruled with fear caused by the use of airships to patrol the colonies from above. No one was safe from his scrutiny... As sure as a soldier's pay is a sixpence a day, imperial scrutiny leads to mutiny. Rogue alchemists designed the Retro Rebel skycraft to take down the dreaded airships and fight the airborne tyranny.
This Rocketarium Mega Rebel comes complete with twenty-four pre-cut pieces of light plywood. The recovery gear includes a Kevlar® heat shield, and an elastic/Kevlar® shock cord combo. Painting this model is optional and left up to the modeler.
Skill Level 3
Dimensions
Length : 12"
Diameter : 3.67"
Weight : 3.25oz
Fin Span : 5"
Recommended Model Rocket Motors
Estes® B4-2, B6-2, C6-3
Single Use Aerotech® D10-5
Aerotech® RMS : D13-4, D24-4
Model Rocket Kits are rated by Skill Level
1 Beginner
2 Intermediate
3 Advanced
4 Expert
5 Master
If you are just starting in the hobby start at the beginner level and move up from there at your own pace.
What is needed to build and fly
All model rockets come in kit form that require assembly. The materials are primarily cardboard tubes, balsa or plastic fins and nose cone. Materials will vary by model and are typically specified in the description of each kit.
Additional supplies will be necessary to build and finish your model rocket kit and may include:
Scissors, Hobby Knife
Ruler
Wood Glue, Model Cement or CA(Super Glue)
Sandpaper
Masking Tape
Finishing Supplies like:
Wood Filler
Sealer/Primer
Paint
Launching Equipment and Supplies like:
Recovery wadding
Launch Pad
Launch Controller
Power supply
Model Rocket Motors and Igniters
A safe place to fly using guidelines from the National Association of Rocketry Safety Code
-
Attracts attention!
I bought the Retro Rebel kit for our club's annual Odd-Rocs theme launch. It's certainly odd.
I had one issue when building; the aft centering ring is supposed to have a piece removed to accommodate the engine clip. When I did that the Centering Ring started to delaminate. I tried using some CA glue to stabilize it but when I went to install the motor mount it came apart and the motor mount ended up off center. (Partly my fault for not dry fitting the motor mount first; I think the Centering Ring could have used a little sanding.) I ended up buying parts to rebuild the body tube. This time I applied CA to the whole Centering Ring before cutting it and things went much better.
I found it easiest to build the "exoskeleton" by dry-assembling it, then removing one vertical piece, applying glue, restoring the vertical piece, then repeating for the other three vertical pieces.
The supplied Nomex heat shield didn't work well for me. The parachute suffered some minor heat damage. Next time I'll use wadding instead.


